About SD card (UBox)
This camera supports micro SD cards up to 128GB in FAT32 format. To ensure proper functionality, always insert the SD card when the camera is powered off, as the camera only detects the card during startup.
Videos stored on the micro SD card are organized by date. However, if a video is recorded when the camera is not connected to a network, it will be saved under a default date (might be January 1, 2021, or December 31, 2020) rather than the actual date of recording.
Some micro SD cards may not be pre-formatted in FAT32. If needed, you can format the card to FAT32 using the camera’s app. After restarting the camera with the card inserted, the app will automatically prompt you to format it. Be sure to back up any important data before formatting, as this will erase all content on the card.
Steps to format SD card in the UBox APP:
1. Turn off the camera and insert your micro SD card. The camera will only check if a card is used when booting up.
2. Turn on your camera. Open the UBox APP. If you haven't made the Wi-Fi connection to pair your UBox account with the camera yet, please make the Wi-Fi connection before the following steps.

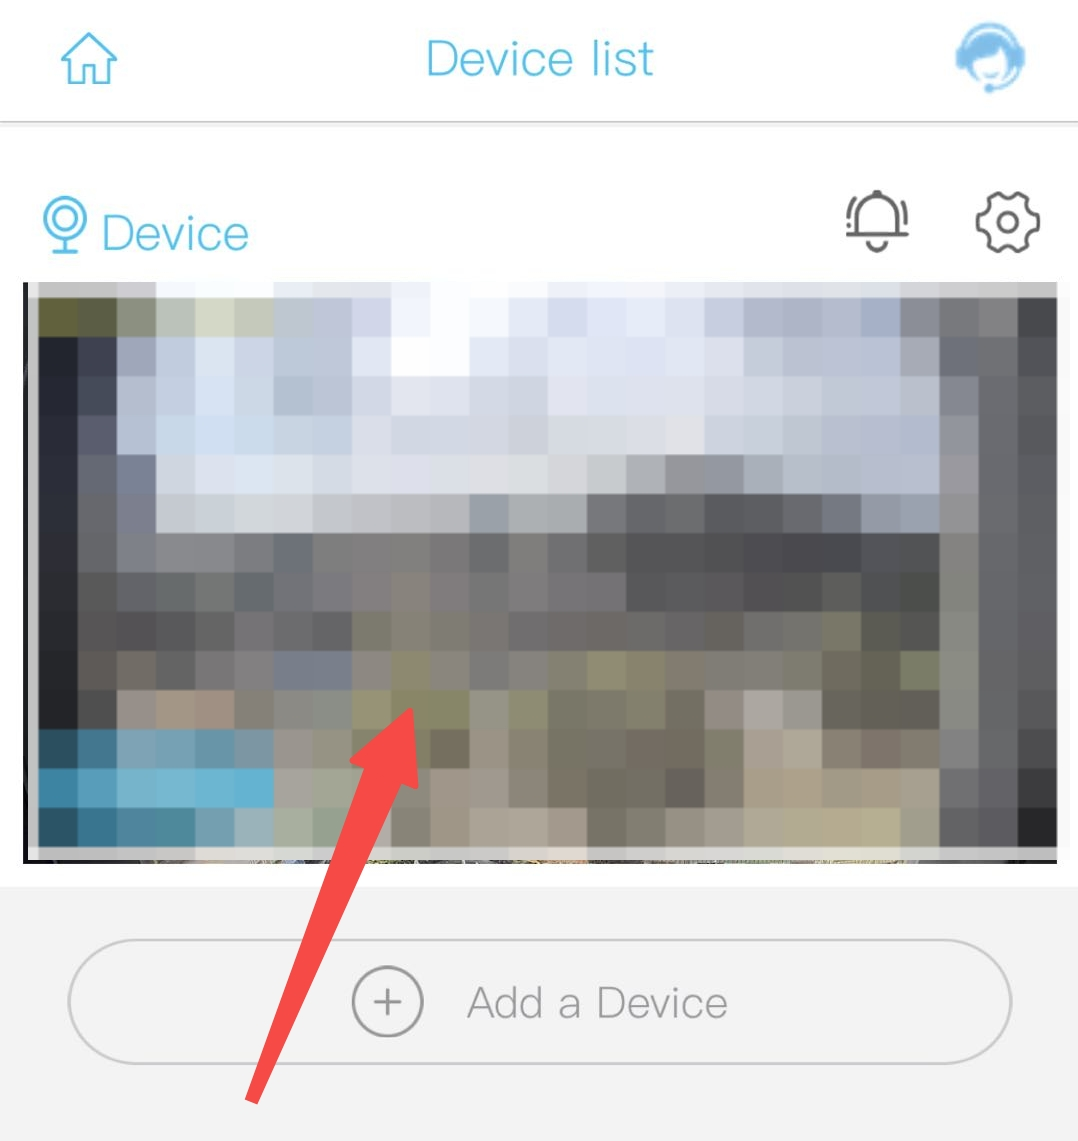
3. Please click on the preview image of your camera to enter the live view interface.

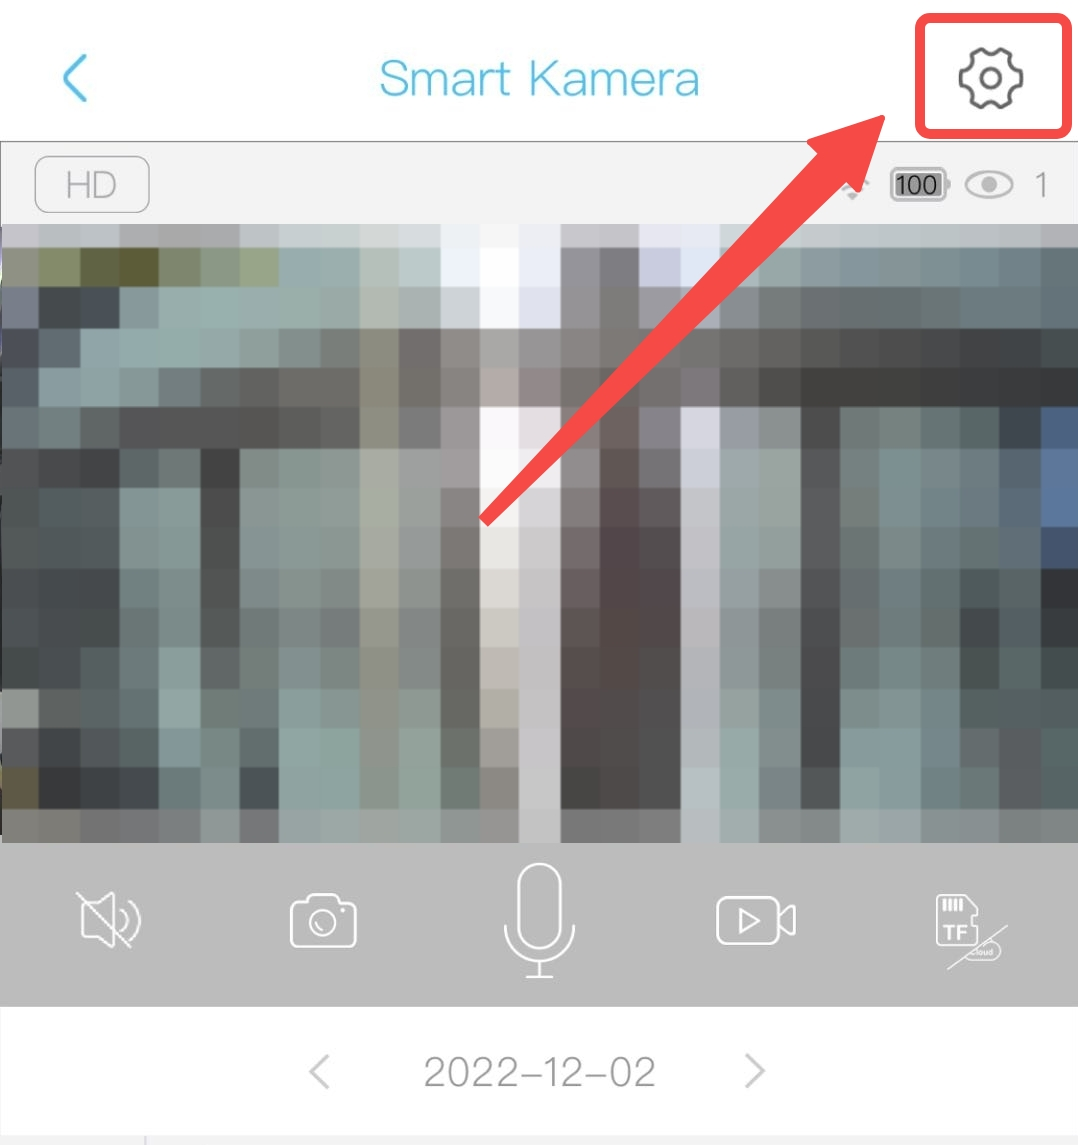
4. Please click the setting button on the top right (the gear icon) to enter the setting interface.

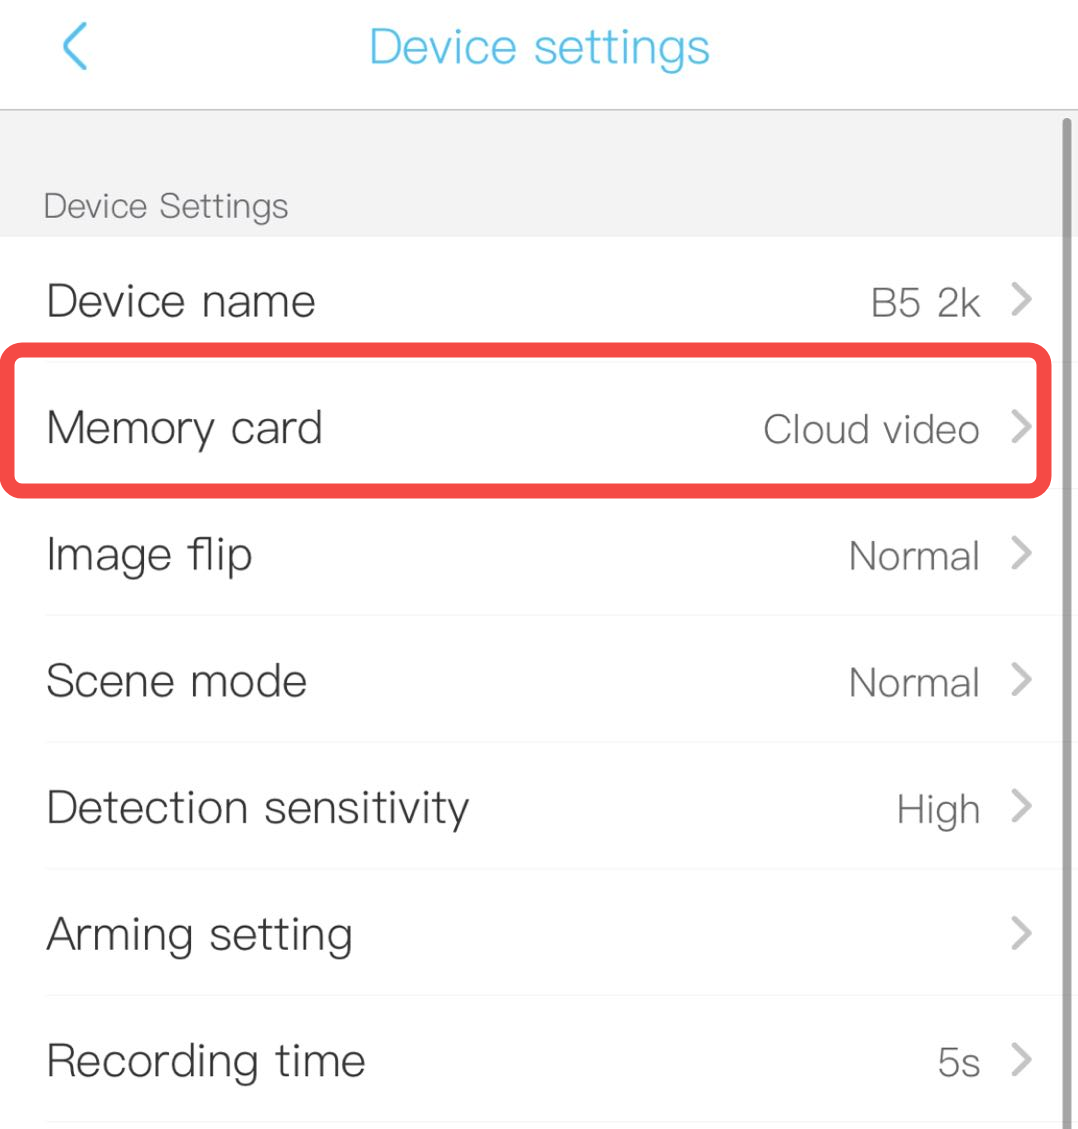
5. Select the "memory card" tab.

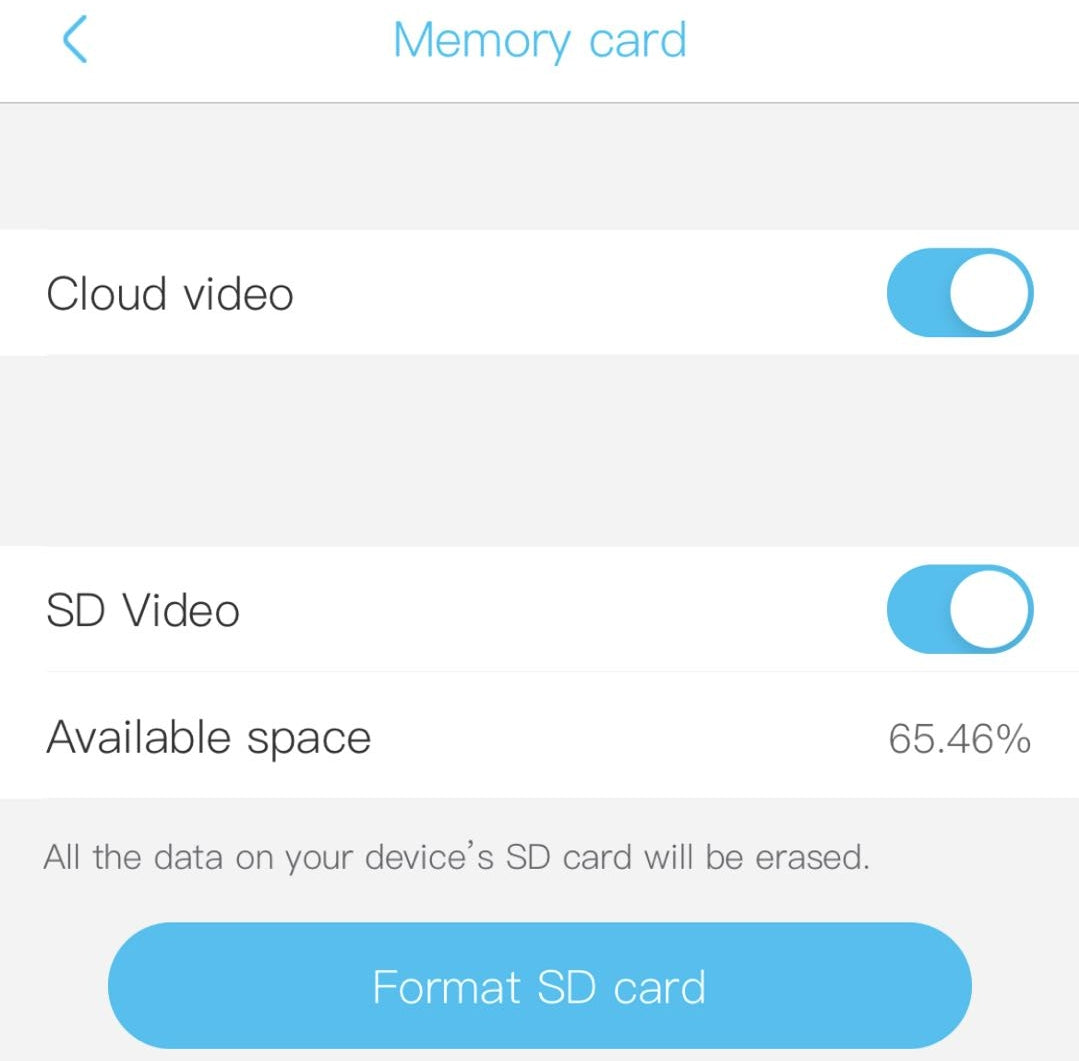
6. Then, you can find the "format" button in the "memory card" interface.
Please restart (not reset) the camera after a format.
7. You can set the length of the motion detection videos stored in the card. Please check the link below for more details.
